
Complete DIY 48V 12,000W+
Offgrid Solar Power System
If you wish to build the ultimate offgrid solar power system, look no further:
- All-in-one units make setup a breeze. Each unit has it's own Inverter, MPPT, Transfer Switch and Battery Charger.
- Budget Friendly. Compared to a victron, this system is 3X cheaper!
- You can scale this system. Use 1-6 units for any size you wish.
- Use this system to backup your home (with an electrician installed transfer switch) or to run an EV or anything you wish!
- Battery Pack uses LiFePO4 which will last 20+ years. Even at the end of its cycle life, it will work just fine (unlike lead acid which goes bad and needs to be replaced).
- High efficiency. These inverters are rated at 93% efficiency and have a low idle consumption of 50W.
- Mostly beginner friendly. If you are hestitant to do the AC wiring, hire an electrician. Show them this page or the manual of the EG4 6000XP, and they will be able to figure it out.
- Max PV input for 1 unit is 8,000W. For 2 units, 16,000W. If you have 6 units, you can use 48,000W of solar panels!
- Max AC output for 1 unit is 6,000W at 120V. For 2 units, 12,000W (either 120/240V). 3 Units can create 3 phase, 18,000W. If you have 6 units, it will output 36,000W.
- Each Unit has a 110A 48V battery charger.
- Each Unit can also be used as a UPS when bypass is enabled. This is great for people who want to use this as a backup battery without solar.
- Recommended battery size is 30kWh. But you can use a smaller battery if you do not have large loads. Even a 15kWh 48V battery bank can power 2 units.
Complete 48V Package Parts List
All-in-one Inverter and Battery Cables:
48V LiFePO4 Battery Options:
- EG4 6000XP All-in-one Solar Power System: Click Here to Purchase
- 2/0 AWG Battery to Inverter Cables (not required if using powerpro battery): Click Here to Purchase
48V LiFePO4 Battery Options:
- Server Rack Battery: Click Here
- Vertical Mount Battery (battery cables included): Click Here
- Load Center w/ Main Breaker: Click Here to Purchase
- 40A Circuit Breaker for All-in-one: Click Here to Purchase
- Retaining Bracket for 40A Inverter Breakers (not shown in build photos, but required by code. It simply holds the inverter breakers into place when back feeding a load center with a breaker. You will need 2X if you have 2X inverters): Click Here to Purchase
- Ground Bar to Separate Ground and Neutrals: Click Here to Purchase
- 3/4 Flex Conduit w/ Adapters: Click Here to Purchase
- 3/4 to 1in Reducing washer (8X required): Click Here to Purchase
- 15 ft of black THHN 6 gauge copper wire: Purchase from Local Hardware Store
- 15 ft of white THHN 6 gauge copper wire: Purchase from Local Hardware Store
- 30 ft of green THHN 10 gauge copper wire: Purchase from Local Hardware Store
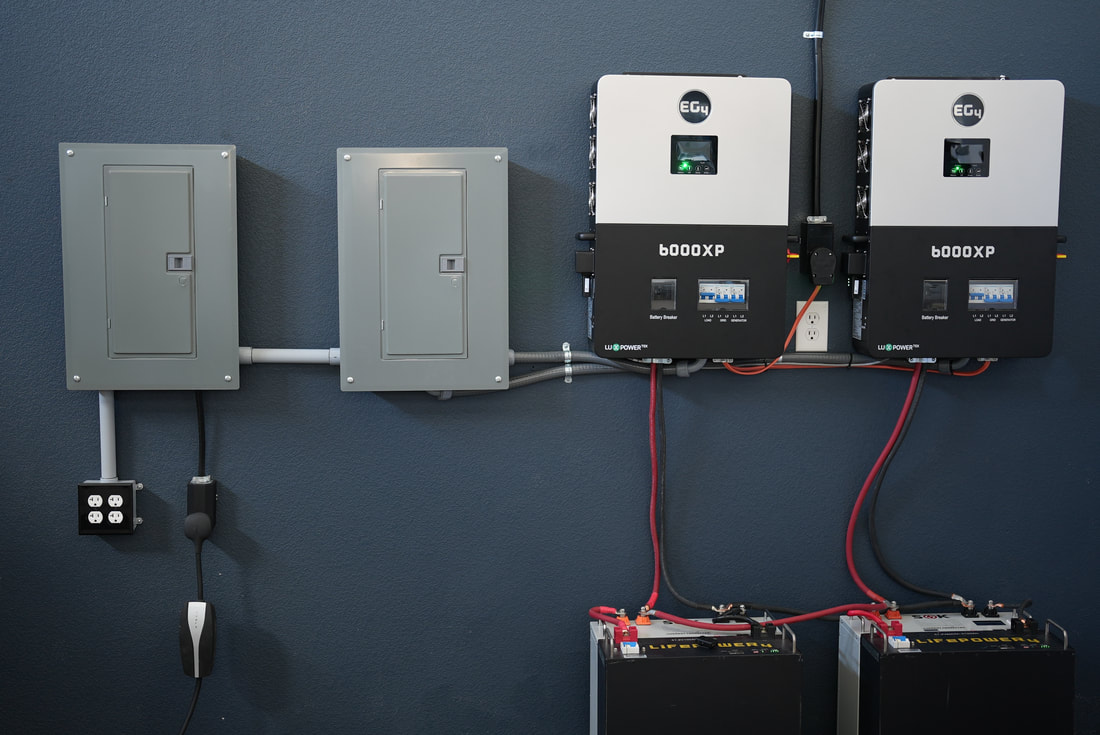
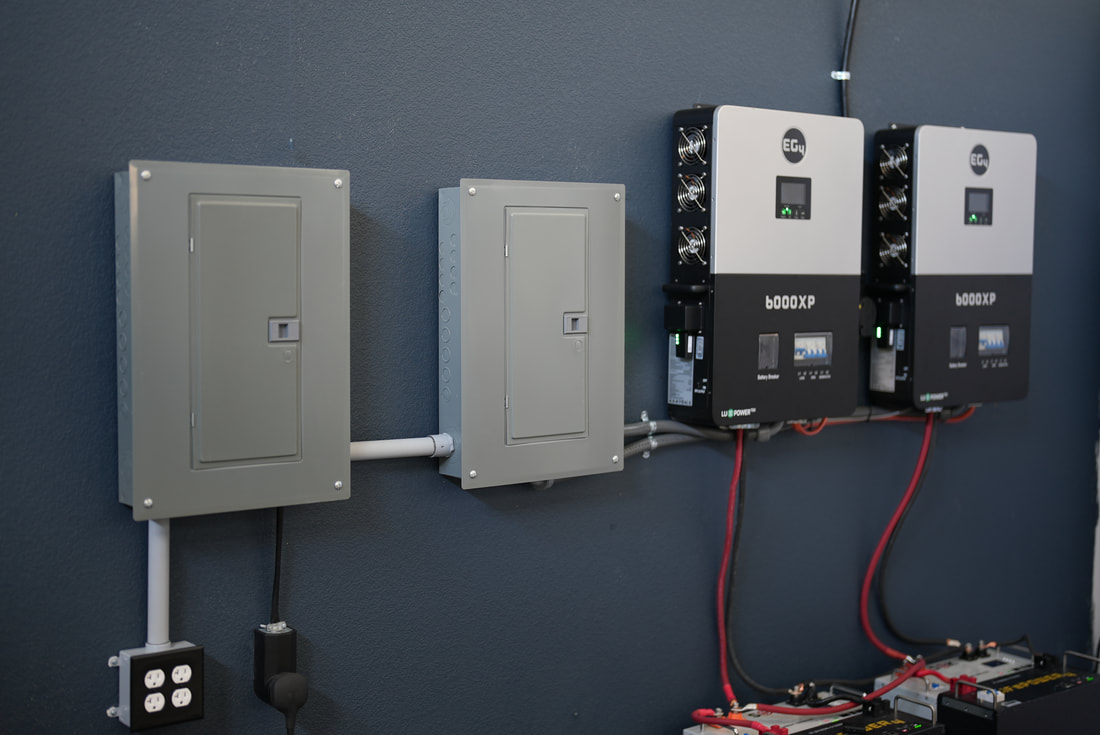
48V Offgrid System Blueprint
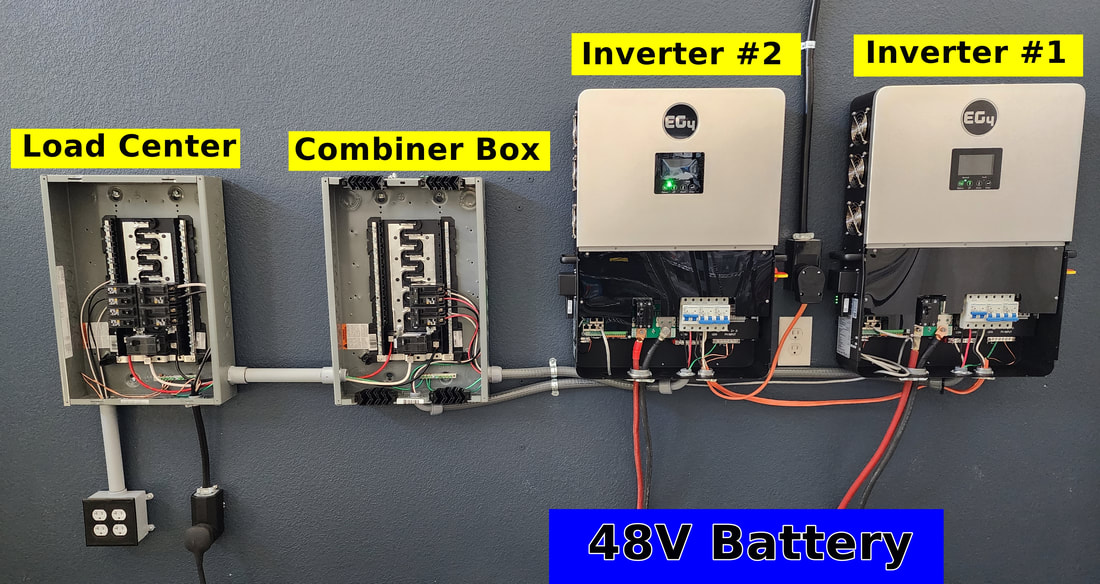
Load Center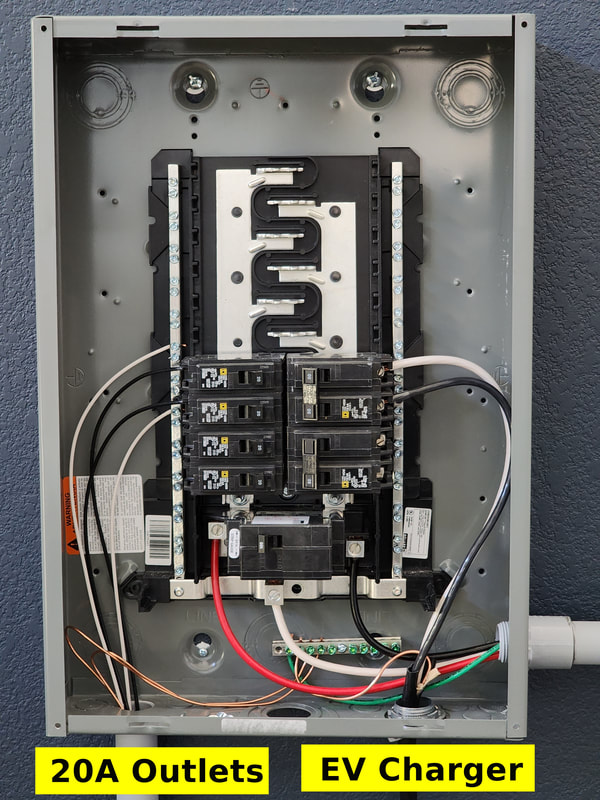
|
Combiner Box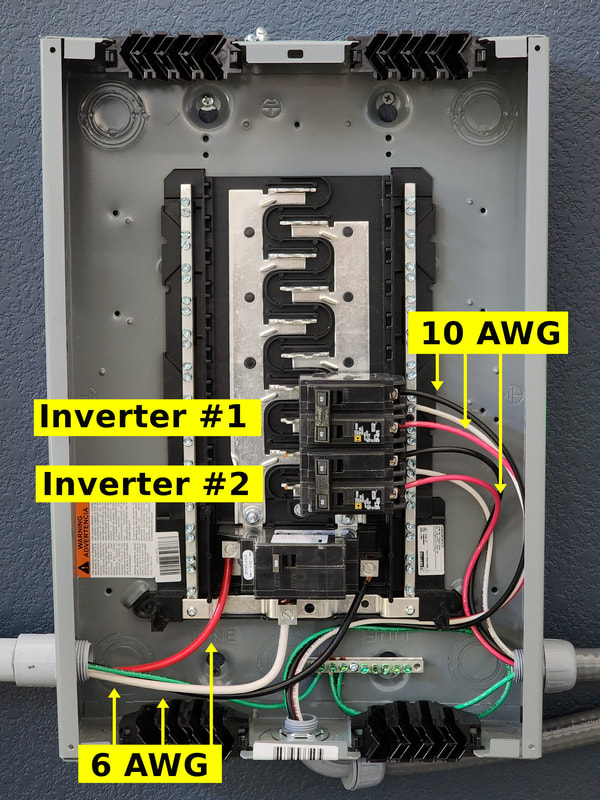
|
Notice that both panels are not using a ground neutral bonding screw (green screw that comes with load center and screws into the neutral bar), and the grounds and neutrals are separate. This is required when using the 6000XP! You will need to purchase a ground bar and install it somewhere in your panels. See images above and notice the green wires are not connected to the neutral bar!
If you add more inverters, you need to ensure that the load center and conductors supplying it can handle the current. When using two inverters in parallel, 6 AWG conductor works great for this.
If you add more inverters, you need to ensure that the load center and conductors supplying it can handle the current. When using two inverters in parallel, 6 AWG conductor works great for this.
Ground Neutral Bond
And AC Charging Discussion
|
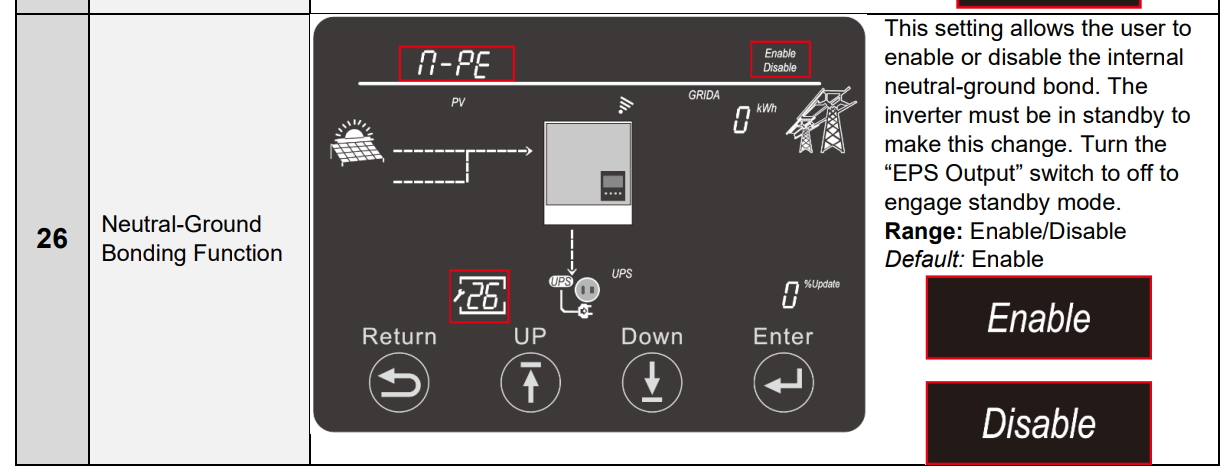
The grounds and the neutrals need to be separate, but there is also something else you need to know. There is a relay inside each 6000XP and a setting you must configure for your setup. This is setting #26 (see picture). This will create or remove the ground neutral bond in the 6000XP. Each system needs to have a single ground neutral bond:
And you'll notice that if you are using this unit for mobile application and "plugging in" to an AC source, you have to change this setting every single time. Not fun! This is probably the biggest downside of this unit. But this unit is mainly designed to be used offgrid, so it makes sense. If you want to use this inverter for mobile application (such as an RV with a 50A plug), and you need to connect to the grid intermittently, charge your battery bank with a dedicated battery charge instead of the 6000XP. That way you will have zero issues! Check out 48V battery chargers by clicking here |
Inverter Wiring
|
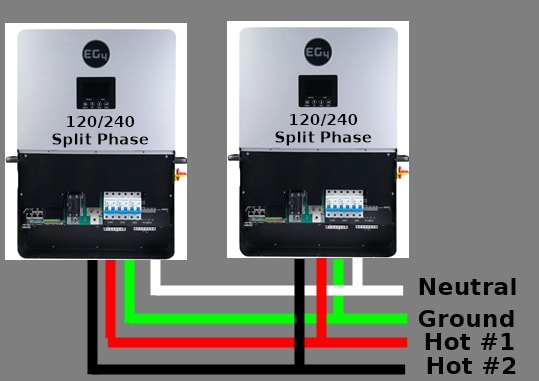
Connecting two inverters is simple. Just put everything in parallel.
The most difficult part is connecting everything to the combiner box. Scroll up to see how to do that. |
|
Server Rack Battery Configuration
|
|
This part is easy! Just have a friend help you slide the batteries into the rack, and connect the batteries to the bus bar. Watch the video on the left to learn how to do this safely because there are lots of small tips and pointers to doing this safely.
This video also covers how to use the precharge resistor circuit in the batteries! This is a crucial step when connecting this many batteries to your system! Follow the step by step procedure to do this safely. |
How can I use this system to
back up my home legally?
How do I ground this system?
|
The best method to use this system in a legal fashion, is to hire a licensed electrician to install a transfer switch for your homes critical loads. Then have the electrician connect the transfer switch to your offgrid solar power system's load center. They will run the proper size conductors, and ground the system to NEC code.
This can be quite tricky, and will depend on where your system is located, if you have multiple buildings, and if you are in a lightning prone area. They will install a ground rod if they feel that it is necessary. Do not earth ground your system if you are not qualified. You could also have the electrician install what is called a RCD (residual current device) or SPD (surge protection device) if your system needs it. I think most things can be done on your own, but not this. Setup the system above as an offgrid system, and have an electrican finish it up. |