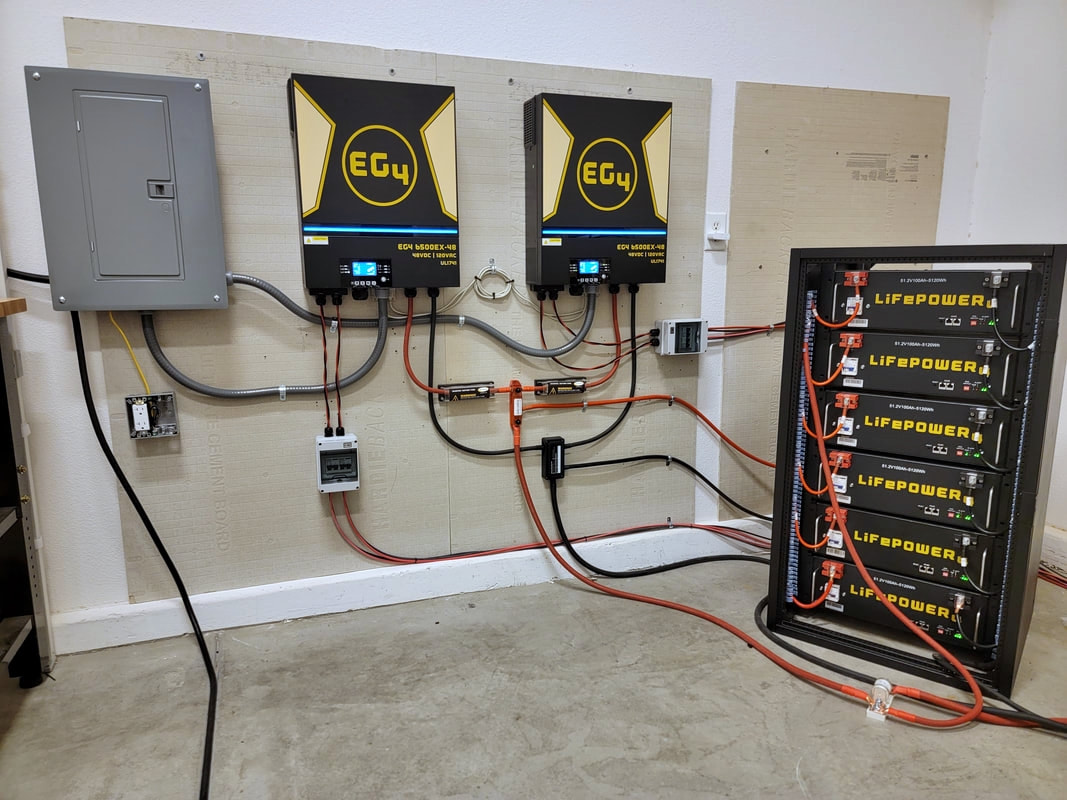
Complete 6,000W AC
Offgrid Solar Power System
If you wish to build the ultimate offgrid solar power system, look no further:
- All-in-one units make setup a breeze. Each unit has it's own Inverter, MPPT, Transfer Switch and Battery Charger.
- Budget Friendly. Compared to a victron, this system is 3X cheaper!
- You can scale this system. Use 1-6 units for any size you wish. In this blueprint, we will use 2 units for a split phase 240V output.
- Use this system to backup your home (with an electrician installed transfer switch) or to run an EV or anything you wish!
- Battery Pack uses LiFePO4 which will last 20+ years. Even at the end of its cycle life, it will work just fine (unlike lead acid which goes bad and needs to be replaced).
- High efficiency. These inverters are rated at 91% efficiency, but in my testing, they pull around 94% efficiency.
- Warranty for all parts used. The battery and inverter have a 5 year warranty when used together!
- Communication system is built in and takes only one cable. This will allow the batteries to control the all in one system.
- Mostly beginner friendly. If you are hestitant to do the AC wiring, hire an electrician. Show them this page or the manual of the EG4 all in one, and they will be able to figure it out.
- Max PV input for 1 unit is 8,000W. For 2 units, 16,000W. If you have 6 units, you can use 48,000W of solar panels!
- Max AC output for 1 unit is 6,000W at 120/240V. For 2 units, 12,000W (either 120/240V). 3 Units can create 3 phase, 18,000W. If you have 6 units, it will output 36,000W.
- Each Unit has a 110A 48V battery charger.
- Each Unit can also be used as a UPS when bypass is enabled. This is great for people who want to use this as a backup battery without solar.
- Recommended battery size is 30kWh. But you can use a smaller battery if you do not have large loads. Even a 10kWh 48V battery can power 2 units.
Complete 48V Package Parts List
- EG4 6500EX All-in-one Solar Power System: Click Here to Purchase
(if the unit above is out of stock, check out more 48V all in one options by clicking here) - 2/0 AWG Inverter Cables: Click Here to Purchase
- 200-300A T-Class Fuse (1X required for each 6500EX. The amazon listing stats that these T-class fuses are rated for 12V only. They are actually rated for 125VDC if you read the data sheet. By design, they could handle more than that. These are high quality fuses that will handle nearly any size LiFePO4 battery): Click Here to Purchase
If you wish to use a 200A Circuit Breaker instead, use this one: Click Here to Purchase - 300A Busbars to connect your all-in-one systems together: Click Here to Purchase
- 4/0 Cables for Battery to Busbar Connection: Click Here to Purchase
- PV DC Isolator (electrical switch between solar array and all in one system): Click Here to Purchase
- Hardiboard for safe system mounting on drywall: Click Here To Purchase
Server Rack Battery Parts list:
- EG4 Budget Server Mount 48V LiFePO4 Batteries: Click Here to Purchase
(For other Server Rack Solar Batteries, Click Here) - EG4 Server Rack: Click Here To Purchase
- EG Budget Battery Tower Deal (6 batteries and a tower rack): Click Here to Purchase
AC Panel Parts List:
- Load Center w/ Main Breaker: Click Here to Purchase
- 60A Circuit Breaker for All-in-one: Click Here to Purchase
- 3/4 Flex Conduit w/ Adapters: Click Here to Purchase
- 3/4 to 1in Reducing washer (8X required): Click Here to Purchase
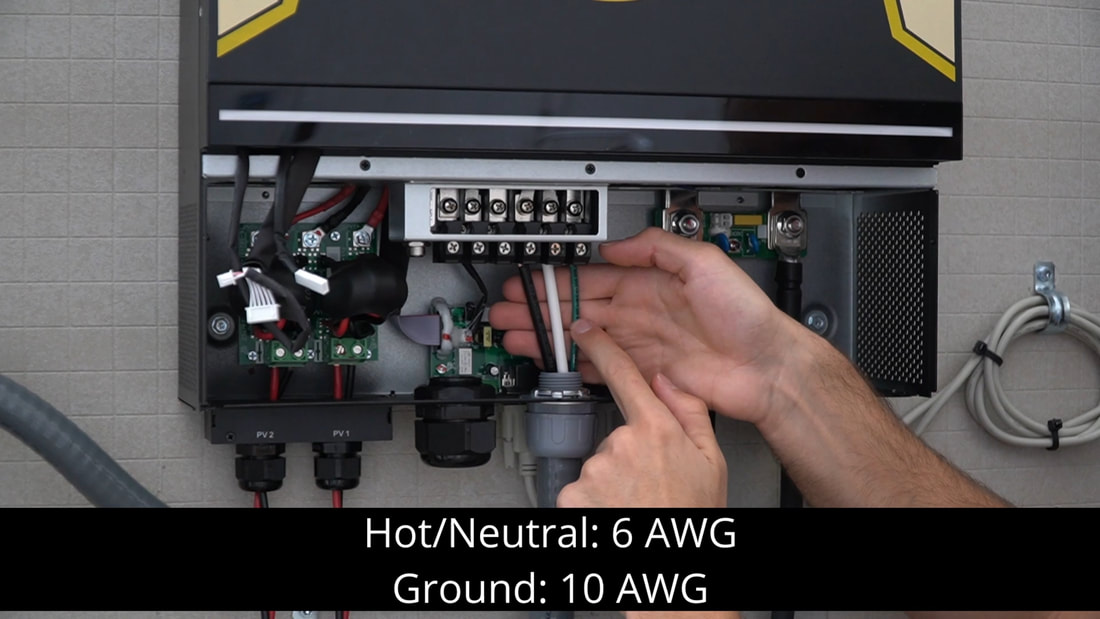
- 15 ft of black THHN 6 gauge copper wire: Purchase from Local Hardware Store
- 15 ft of white THHN 6 gauge copper wire: Purchase from Local Hardware Store
- 30 ft of green THHN 10 gauge copper wire: Purchase from Local Hardware Store
Total Cost of 2X All-in-one's and Wiring: $3,283
Battery Tower (you can use a smaller battery if you can't afford this): $10,168
This does not include Solar Panels, Racking or Installation
(this price can vary drastically depending on your roof and type of solar panel being installed)
Battery Tower (you can use a smaller battery if you can't afford this): $10,168
This does not include Solar Panels, Racking or Installation
(this price can vary drastically depending on your roof and type of solar panel being installed)
How to Build it. Watch this video:
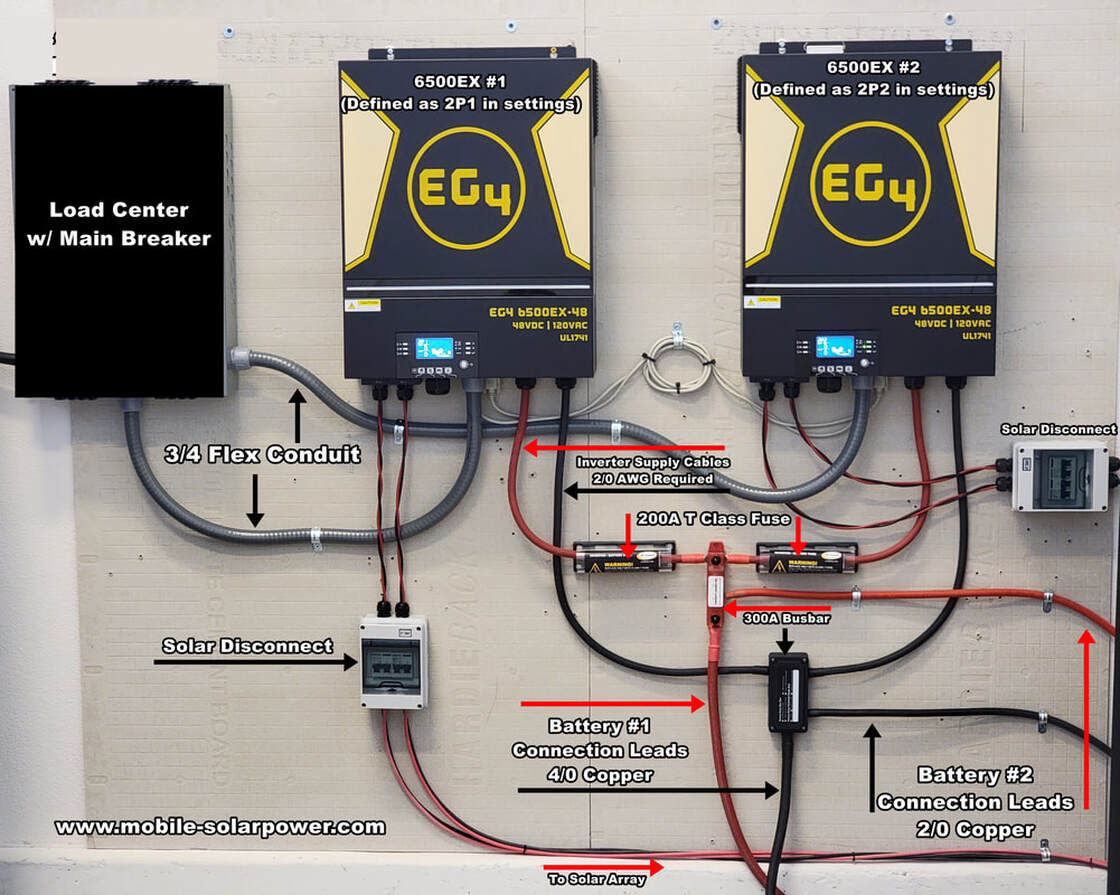
48V System Blueprint
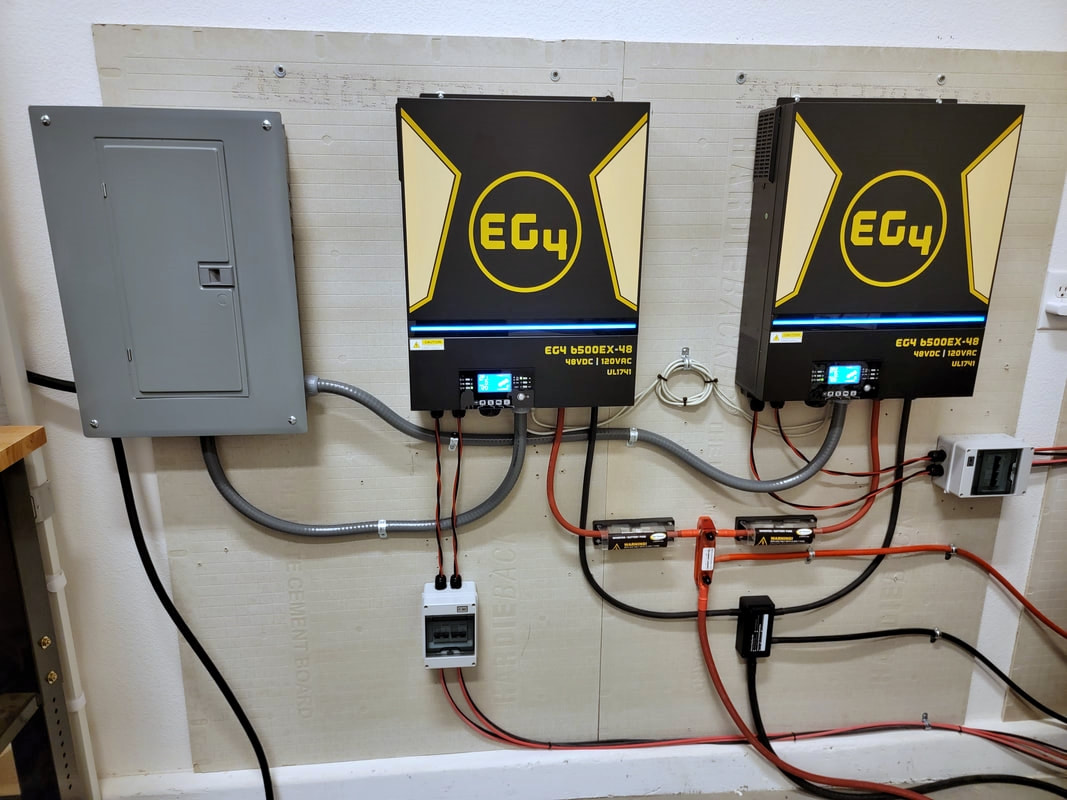
First you need to mount hardiboard (cement board) to a wall. Then mount the all in one units on the wall, with 20cm of space between each unit. Then attach the battery cables/fuse/busbars and batteries with this schematic:
After the batteries are connected, you can then connect the PV conductors. Be sure to do this step at night when your panels are safe to work with if possible. Because you are mounting your panels on the roof, building safety codes for wiring and permitting solar panels are applicable. I recommend hiring a professional to do this step. have them wire up an PV disconnect to your array, then run conductors from your disconnect to the PV input on the EG6500EX. Using conduit is usually required for this step.
Next, connect the flex conduit from your 6500's, and to the load center. Follow the schematic below for these connections:
Next, connect the flex conduit from your 6500's, and to the load center. Follow the schematic below for these connections:
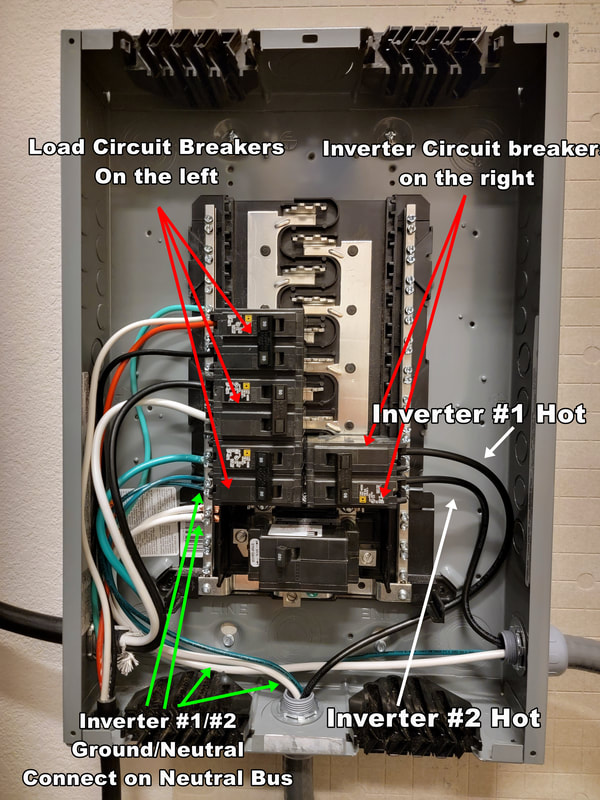
Load Center Panel Schematic |
The hardest part of this system is the AC output connection. If you plan to use this as an offgrid system, or as a backup for your house panel, use the wiring configuration on the left:
Earth grounding will be determined by your mounting environment and/or local code. You can earth ground this main panel without issue. If you are using the UPS/bypass enabled configuration, do not earth ground your panel! Hire a professional for this step if you do not understand. 6500EX Wiring Schematic |
Server Rack Battery Configuration
|
|
This part is easy! Just have a friend help you slide the batteries into the rack, and connect the batteries to the bus bar. Watch the video on the left to learn how to do this safely because there are lots of small tips and pointers to doing this safely.
This video also covers how to use the precharge resistor circuit in the batteries! This is a crucial step when connecting this many batteries to your system! Follow the step by step procedure to do this safely. |
How can I use this system to
back up my home legally?
How do I ground this system?
|
The best method to use this system in a legal fashion, is to hire a licensed electrician to install a transfer switch for your homes critical loads. Then have the electrician connect the transfer switch to your offgrid solar power system's load center. They will run the proper size conductors, and ground the system to NEC code.
This can be quite tricky, and will depend on where your system is located, if you have multiple buildings, and if you are in a lightning prone area. They will install a ground rod if they feel that it is necessary. Do not earth ground your system if you are not qualified. You could also have the electrician install what is called a RCD (residual current device) or SPD (surge protection device) if your system needs it. I think most things can be done on your own, but not this. There is a lot to understand, and you cannot screw this connection up. Setup the system above as an offgrid system, and have an electrican finish it up. |

