Tesla Model S Battery for Off-grid Solar Power System
I DO NOT RECOMMEND USING A TESLA BATTERY FOR SOLAR STORAGE. It may be cheap and light weight, but thats about it. Build a LiFePO4 battery instead! It will last much longer and its much safer. Proceed at your own risk. Also, I ran my tesla module without a bms for months without issue, but I do not recommend others do that. Use a bms!!!
This project is not for beginners! If you mess up even a single number while programming the charge parameters, you can catch your entire rig on fire! If you understand electronics though, this system is super easy to build, super cheap and insanely powerful!
Benefits of using a tesla battery instead of lead acid/other lithium batteries:
Cost:
When considering cycle life, lead acid is most expensive because it needs to be replaced every 2 years or so. Compare that to Lithium which can usually last around 15-20 years! Lithium iron phosphate batteries are the preferred RV solar lithium battery chemistry, but they can cost a lot of money initially. A 100 amp hour lithium iron phosphate battery costs $1000. A single tesla battery can be bought on ebay for $1300 and is the equivalent of 4x 100 amp hour lithium iron phosphate batteries! So instead of spending $4000 on a set of lithium batteries, you only need to spend $1300.
Weight:
Tesla Battery Pack (5kwh) -55 pounds
Lead Acid Bank (5kwh usable- 50% DoD) - 480 pounds
Lithium Iron Phosphate (5kwh) - 112 pounds
Charge/ Discharge Capabilities:
Out of this world compared to the competition. Tesla battery pack can discharge 1100 amps! I can't seem to find a charge rate (depends on temperature of cells), but nearly any sized mobile solar array will be fine with a tesla battery. Also, the resistance of the tesla battery is much lower than a lead acid battery, so increased performance for anything you connect to it.
Charging Efficiency (coulombic efficiency):
A flooded lead acid charge efficiency is 70%
A sealed lead acid charge efficiency is 95%
A lithium battery is 98%+
24 volt system:
Higher voltage means less wire loss, and ability to use thinner gauge wires.
Using a 24 volt system instead of a 12 volt system will nearly double the capabilities of your MPPT solar charge controller (just make sure it can handle 24 volt battery systems). My 40 amp charge controller could only handle 520 watts, and now it can handle 1040 watts.
How to use a Tesla battery
There are 5 crucial things that you need if you plan to use a tesla battery:
- Low Temperature Cut-off or Heating System: Lithium batteries can NOT be charged below 0 degrees Celsius. If it is charged below this temperature, it will be permanently damaged and will be unsafe to charge. Try to find a solar charge controller with low temperature cut-off, or build your own thermostat controlled heater pad to keep the battery warm. I am keeping my battery in my living area so it stays nice and warm during the winter.
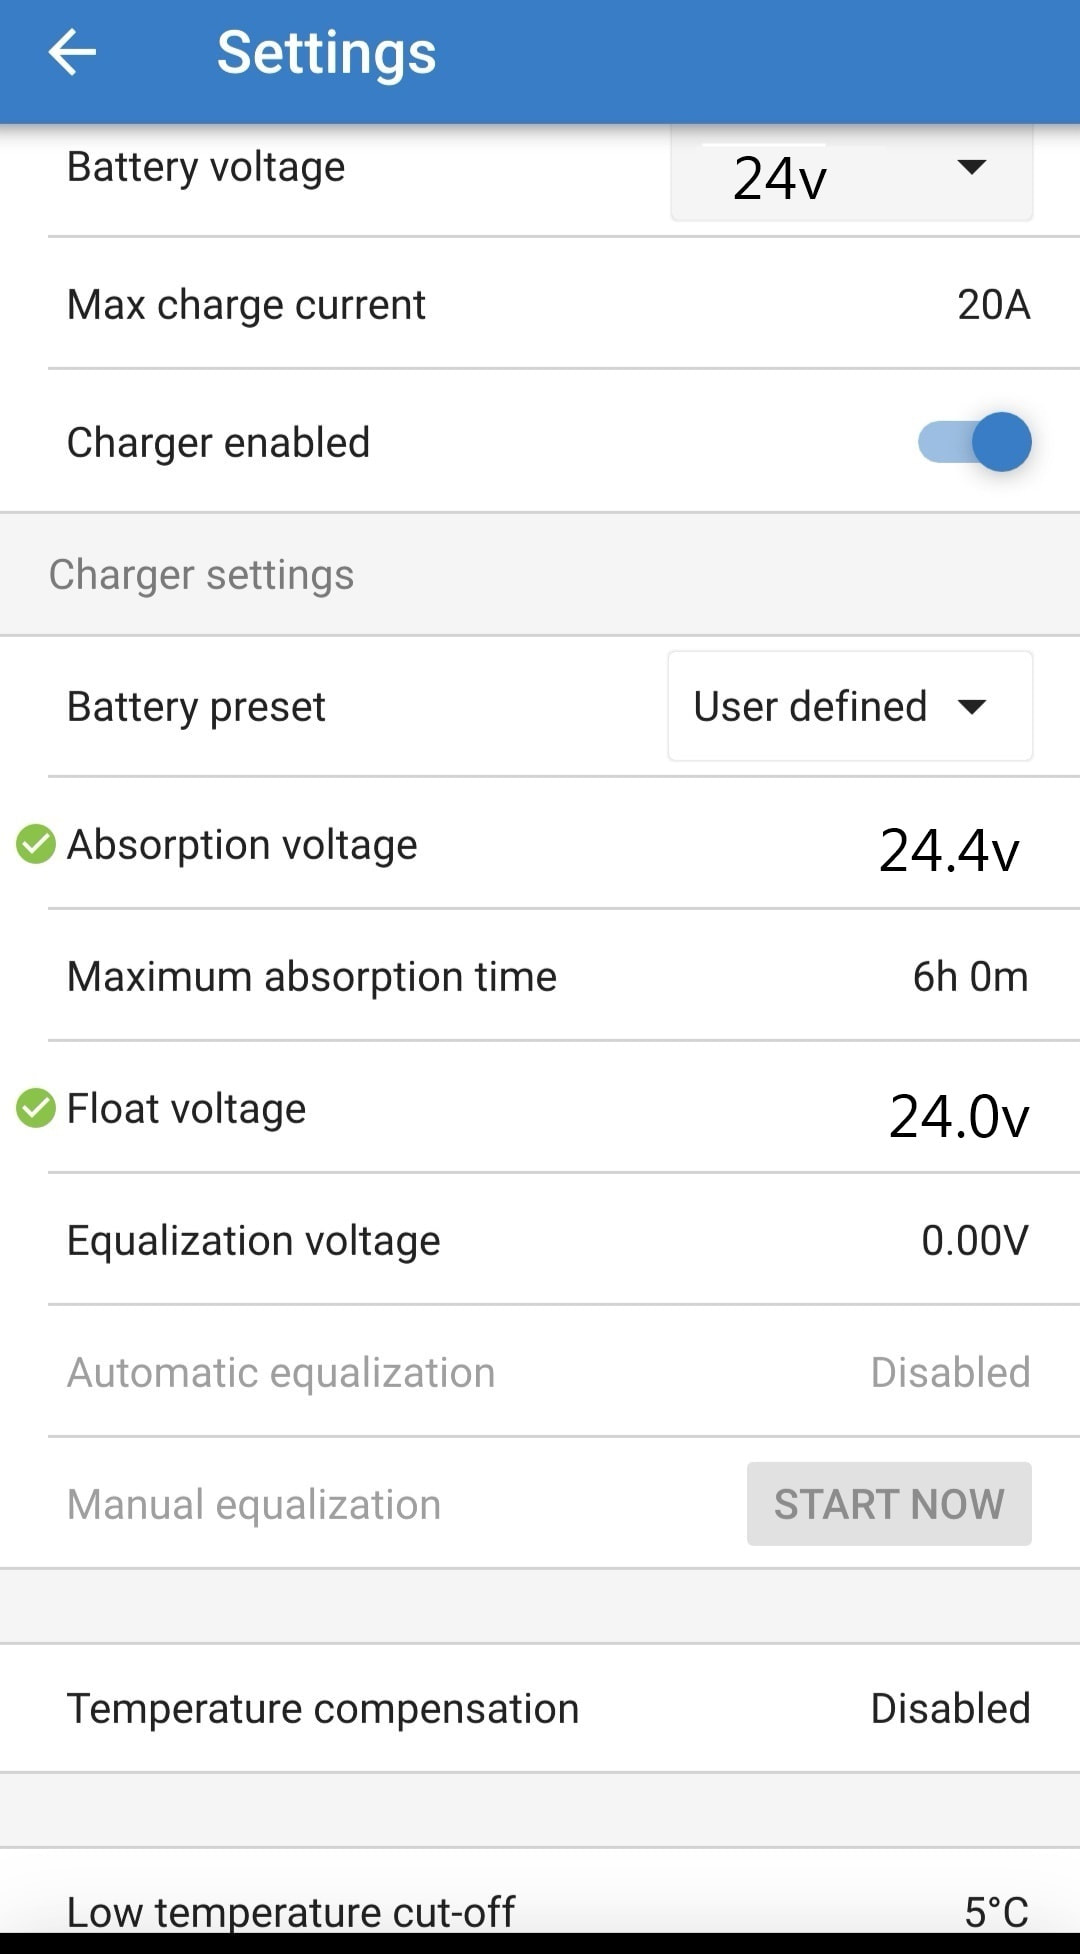
- MPPT Charge Controller Capable of Charge Profile Editing: The charging voltage should not exceed 24.4 volts. If the voltage of the tesla battery pack exceeds 24.4, the cycle life will suffer. If the voltage exceeds 25.2, the battery will overheat and start a fire. To be on the safe side, set the maximum charging voltage to 24 volts and you will be good to go.
Also, disable equalization and make sure the float voltage is right below 24.4. I am currently using a float voltage of 24.3 volts. - Over-Discharge Protection System: If you over discharge the tesla battery, it will change the chemistry of the battery and permanently damage it, and it will be unsafe to charge again. To ensure that this never happens, the tesla battery should be able to disconnect itself from the loads of your system if it is discharged too low. You can build your own relay system, or simply buy a Victron Battery Protect. I have the cut-off voltage set to 19 volts.
- High Temperature Protection (not needed for most systems): If you plan to run a 26,000 watt inverter, or plan to charge with hundreds of amps, you will need to cool the battery. Luckily, this is usually not necessary for most mobile application systems. The largest load I plan to run is a 2000 watt inverter, and charge at 41 amps, so I do not need to worry about cooling the battery off.
- Cell Balancing: This may or may not apply to you. Here are 2 example situations:
-If you were to use this battery as it is designed to work in a Tesla Model S, and cycled the battery between 0%-100% state of charge, and used high C ratings (current draw) while discharging (such as 500-1000 amps at 24 volts), chances are you would need to balance the cells every few charges. This could easily be done with a RC airplalne battery cell balancer. They are about 15 dollars and balancing the cells will take only an hour or so.
-If you are using this battery for a small solar power setup at low C ratings (such as charging it slowly all day with a solar array less than 2000 watts and powering small loads under 100 amps at 24 volts) AND you are using my recommended charge profile that cycles the battery from 20%-90% that is mentioned later in this article, you probably do not need to worry about cell balancing. I had this system running 24/7 for 4 months without a cell balancer, and the cells were off by .01 volts. If you want to go without a balancer, you can check the voltages every six months or so.
Either way, if you buy the battery I recommend below, it will come with a wire that can plug into a standard $15 rc airplane battery balancer. Better to be on the safe side and buy it regardless, but I just want you guys to know that it may not be that necessary considering our given application.
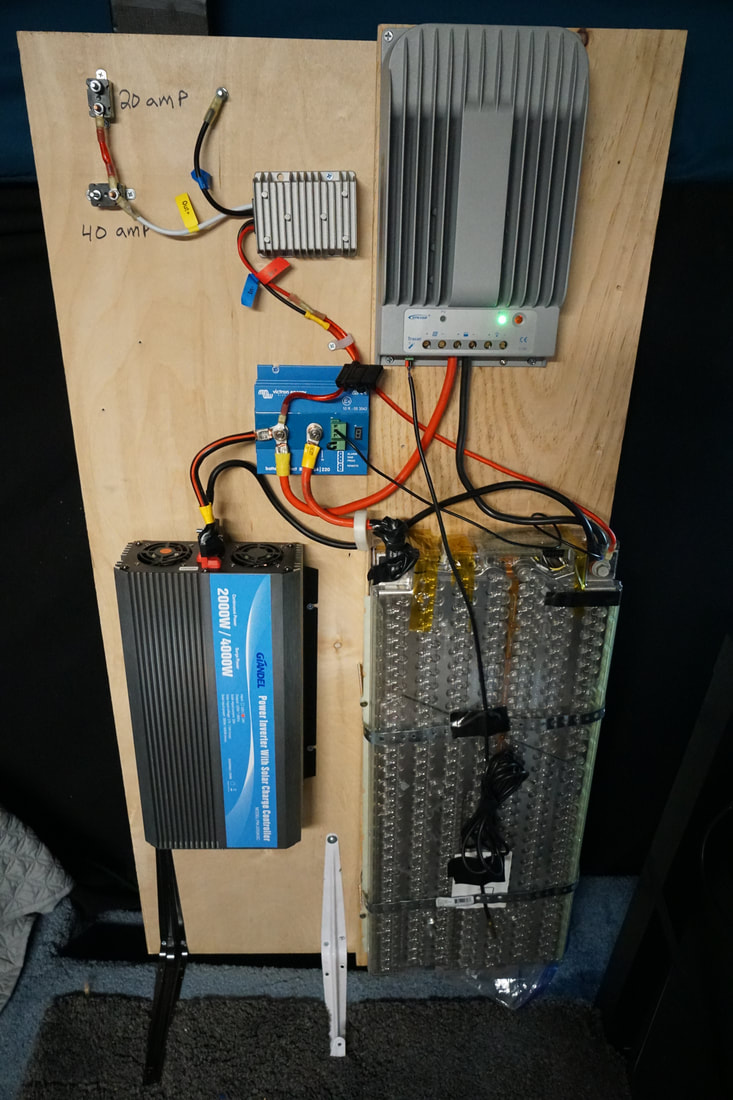
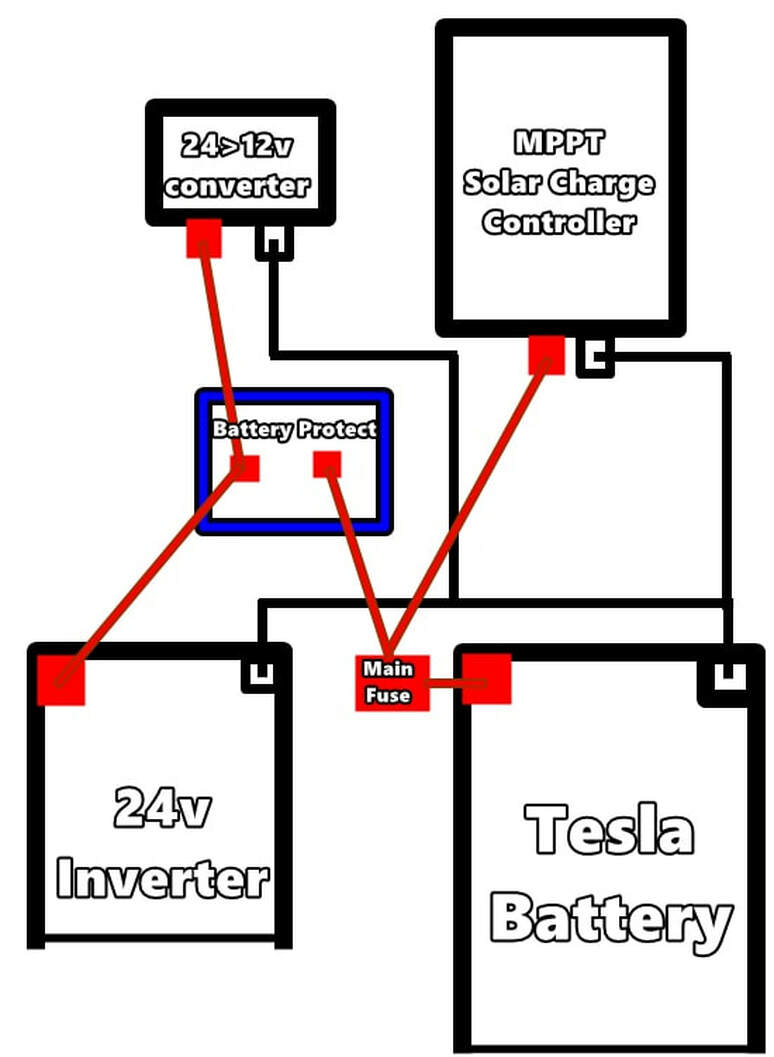
My Dead Simple Tesla Battery setup:
Update to schematic above: Connect solar charge controller directly to the Tesla Battery Fuse (battery fuse shown above is covered in electrical tape but it is attached to the positive terminal of the tesla battery). Do not connect it to the load terminal of the battery protect as shown in the picture. Also, use a victron charge controller (link in parts list below). It is 100x easier to program.
Also, use a victron solar charge controller! Takes seconds to program. The one in the picture above is a pain to program.
The battery protect load disconnect works one way and can still accept charging, but after testing it out, it disconnects the MPPT. The MPPT needs to be connected to a battery at all times for it to work. You can attach a normal battery charger to the battery protect terminal, but not an MPPT. I hope this helps.
Updated schematic:
Updated Tesla Battery Parts List:
(I Make A Commission For Purchases Made Through The Links Below)
- Tesla Battery Module Sponsored links to ebay (ask for a balance cable if you want it):
Ebay Source #1 (balance cable included but usually out of stock): Click Here
Ebay Source #2 (no balance cable but great seller): Click Here
Ebay Source #3 (no balance cable but great seller): Click Here
- 2000 watt 24 volt Pure Sine Wave Inverter: Click Here
- UPDATED Charge Controller: Use a victron. It takes seconds to program and has low temperature disconnect for charging. I do not use the Epever for custom charge profile packs anymore. Click here to find one for your system
- Victron Battery Protect 220 amp: Click Here
- Programmable battery monitor (manually program max and min voltage settings to estimate capacity): Click Here
- 24 volt to 12 volt Converter (so I can still use 12 volt appliances): Click Here
- 175 amp Bolt on Fuse (good rating for 24 volt 2000 watt inverter including surge): Click Here
- Cold Temperature Protection Heat Pad: 12 volt thermostatically controlled black water tank heater pad. This will connect to the converter and automatically heat up the battery if the battery gets too cold (I do not have one on mine because I live in san diego). This heat pad will turn on at 45 degrees F, and shut off at 68 degrees F, so to ensure that this heater pad does not waste any power, be sure to insulate the battery compartment and area around the battery. If it is insulated nicely, this pad will work well. If the battery is next to a lot of metal, such as an outdoor battery compartment that is vented, you will need to find another type of heater pad that turns on at a lower temperature. Click Here
- Cell Balancer: If you buy the recommended tesla battery above, it will have a cable that comes out of it that can plug into a cell balancer. The one that I use, and many others use, is this one: Click here
- Amp Meter (put it over the main bolt on fuse to see how much power is going in and out of your system): Click Here
- Recommended Tools: Click Here
My current Charge Profile Parameters:
Regardless of what solar charge controller you use, you can use my charge profile parameters. Program every parameter in manually. The most important parameter is the charging limit voltage. If this is parameter is above 25.2 volts, the tesla battery can catch on fire. If the charging voltage limit is at 24.4 volts, your tesla battery will last a long time and will be good to go. You can copy these into your charge controller directly. Make sure that you use only the numbers in the red box:
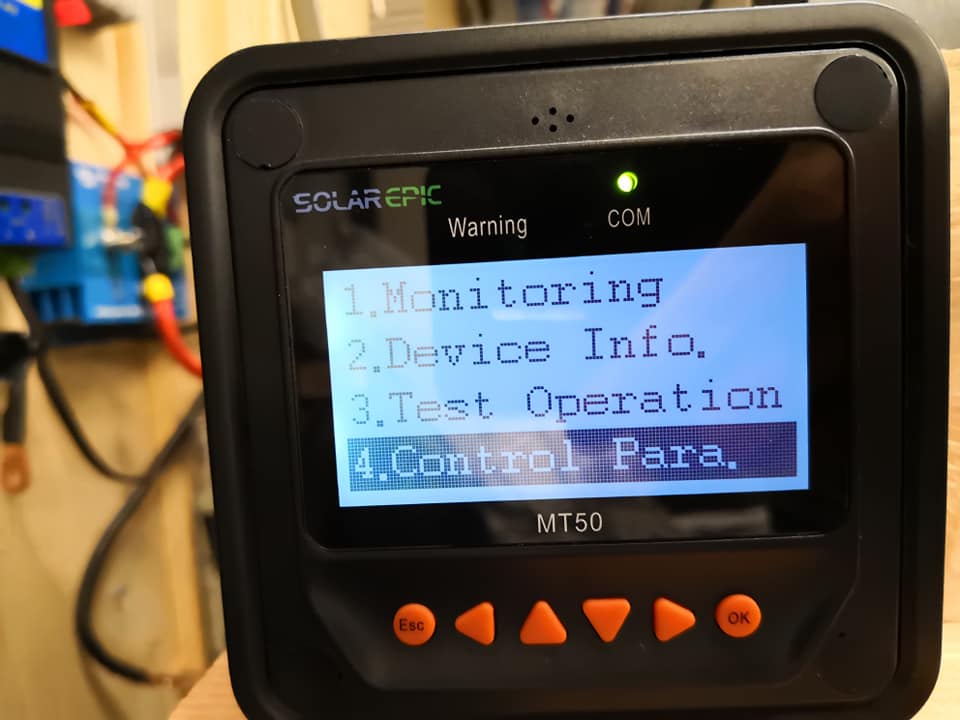
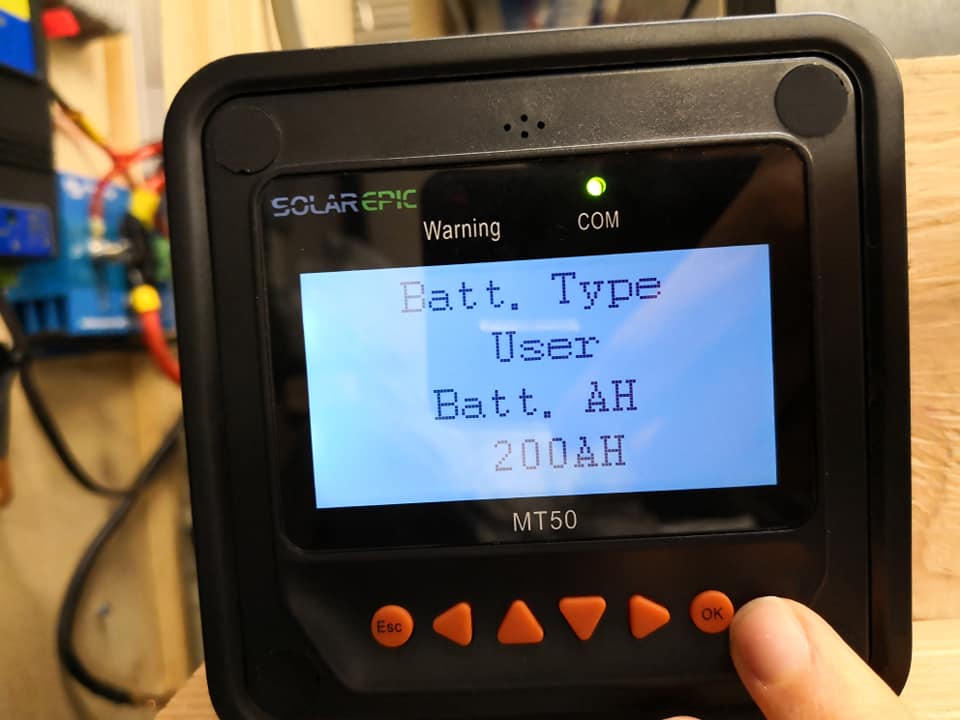
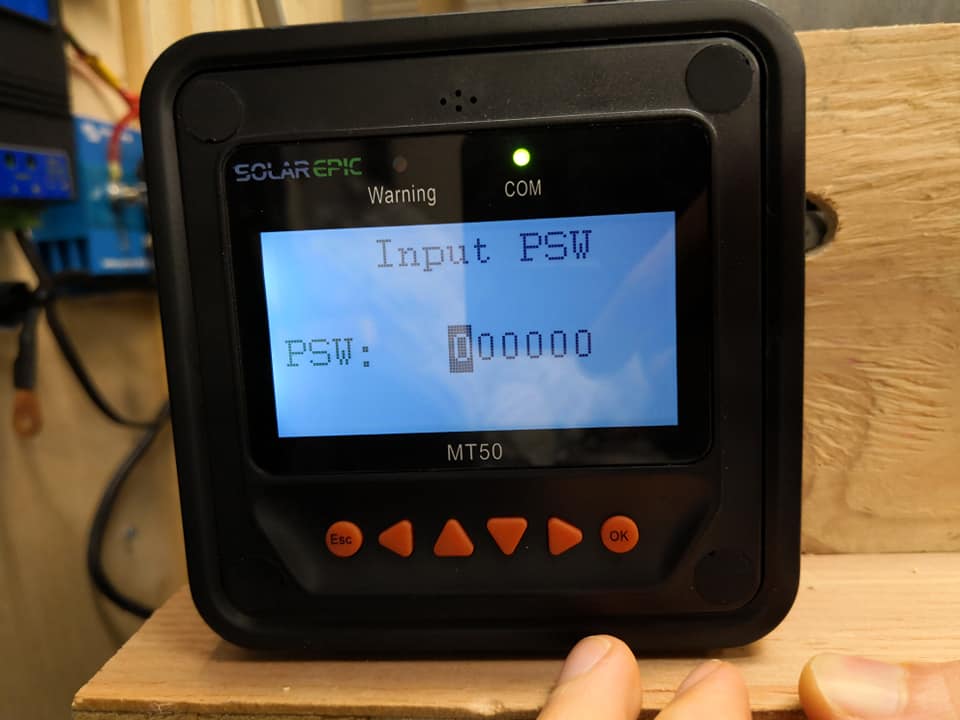
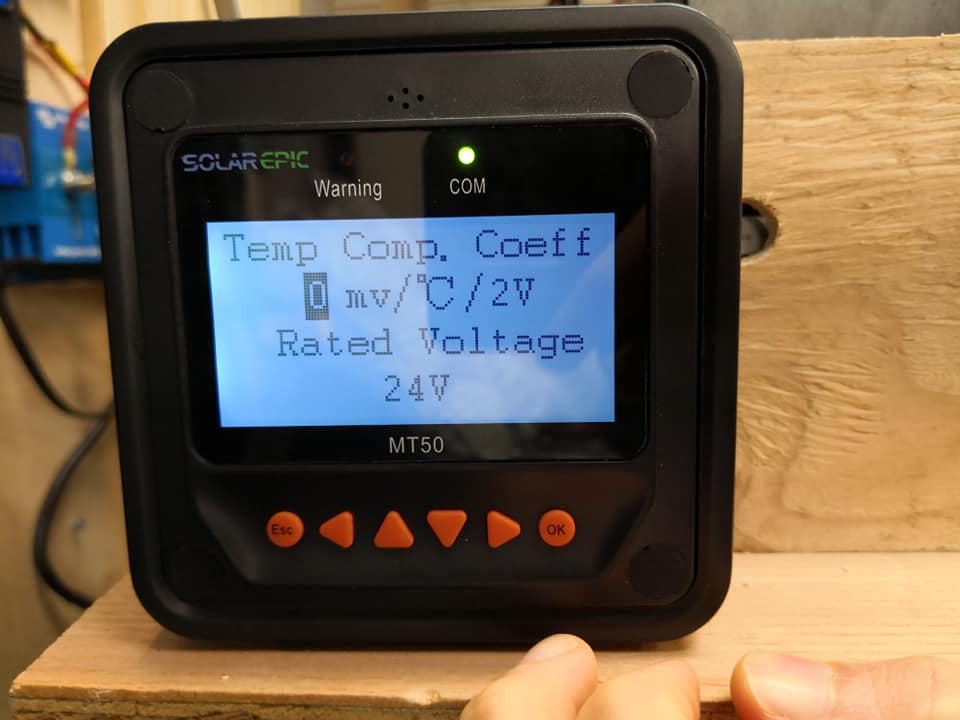
Picture guide to change the charge profile parameters on my recommended charge controller: (or save your time and use a victron controller instead!! Way easier. Check out my charge controller section for more information)
1. Press "esc" button to reach the main menu. Scroll down and select "4. Control Para." and press "ok". In the control parameter menu, use the arrow keys to navigate around and see the current charge profile parameters.
2. If you want to change a parameter (especially charge limit voltage, if you are using a tesla battery), hold down the "ok" button. If it asks for a password input, leave it blank and hold down "ok". Now you will see the charge profile parameter number flash, and you can use the arrows to change the parameter.
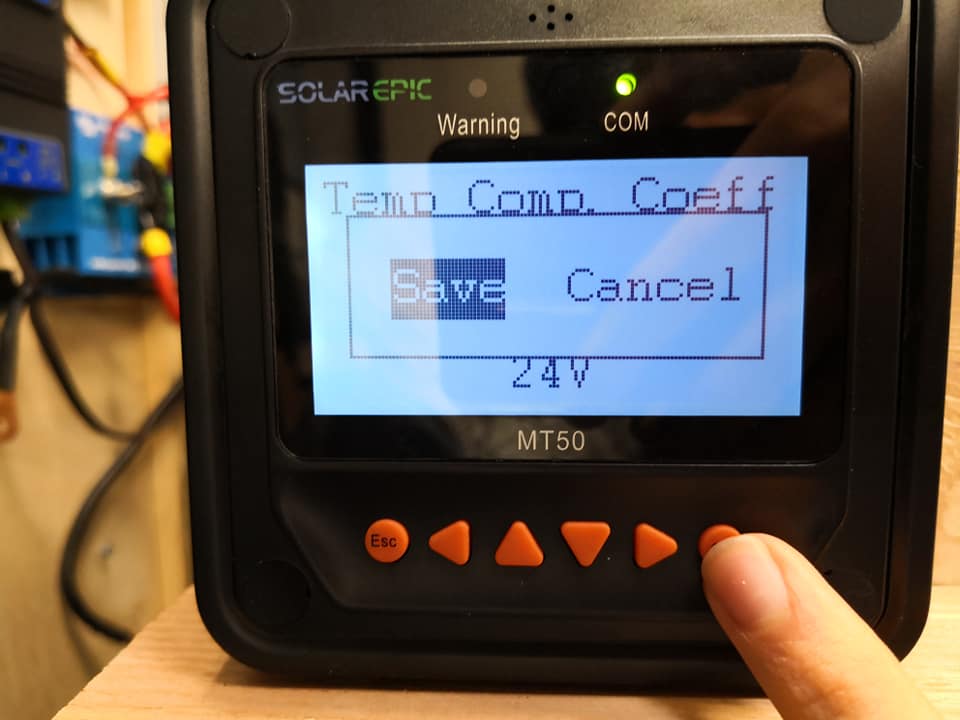
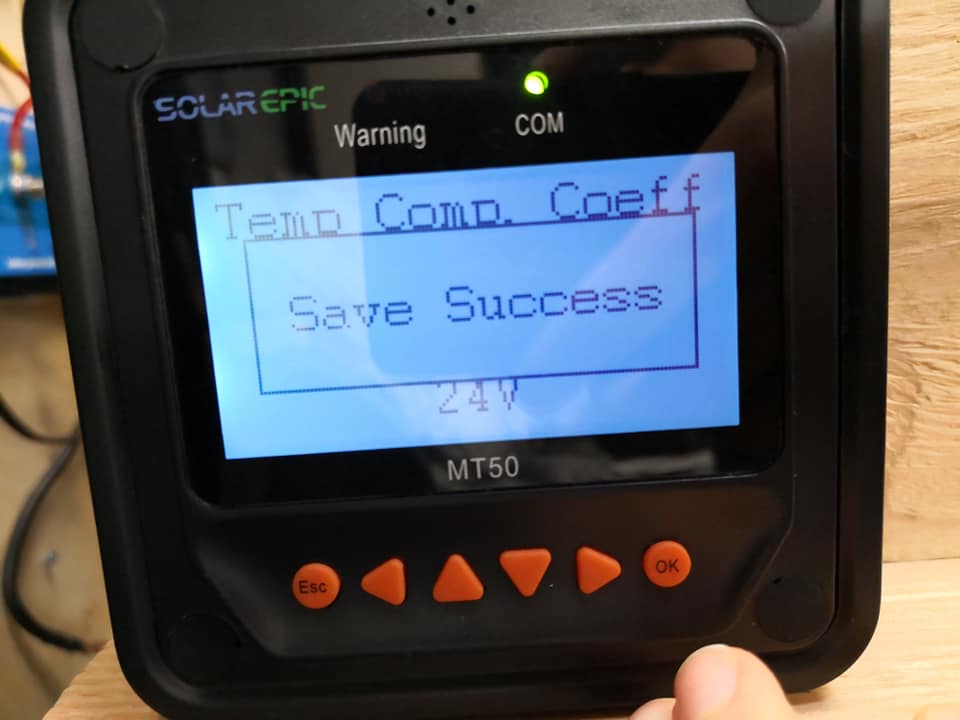
3. When you are done editing the parameter, press "ok" and it will ask you to save the settings. Press "ok" again. You need to repeat this process every time you change parameters on a screen (so you can only edit two parameters at a time).
If you are using the tesla battery, use my current charge profile parameters mentioned early and copy them, one by one, into the controller.
If you are using the tesla battery, use my current charge profile parameters mentioned early and copy them, one by one, into the controller.
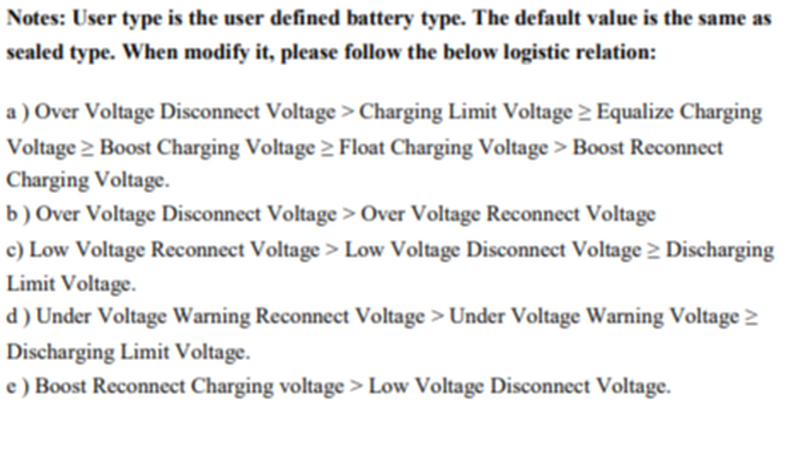
if you get the dreaded "para error"..
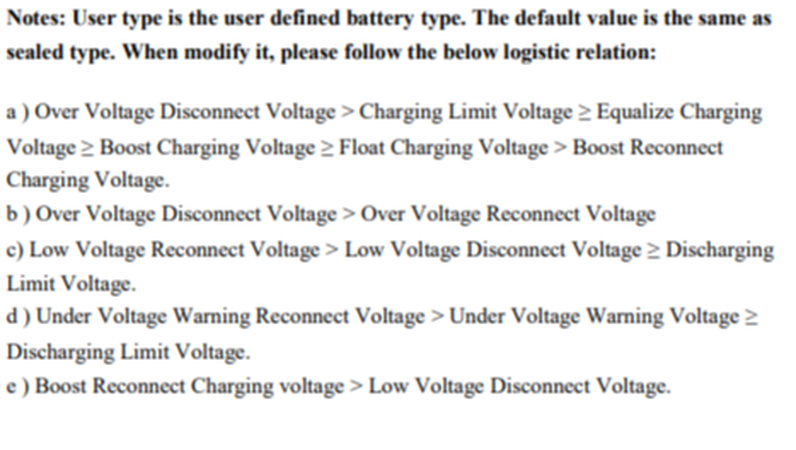
If you get "para error", it means that one of the figures you are programming does not agree with other parameters. Use the guide below to make sure that your parameters agree with each other. This can be a major pain in the butt. Sometimes you need to program one parameter first, and then another one second to avoid the "para error" message. Here is the guide:
What I like to do to avoid the dreaded "para error" message is I take the default values for a 12v system, and use it as a reference to design a new charge profile at a new voltage (such as the teslas 25.2 volt max system:
Then I will program them in one by one until I get a para error, then I go to the guide mentioned a second ago to figure out which parameter is not agreeing with the others.
It can take a few minutes to get down, but its not that difficult. Its a fun little puzzle and when you solve it, you can do it a hundred times over pretty quickly.
It can take a few minutes to get down, but its not that difficult. Its a fun little puzzle and when you solve it, you can do it a hundred times over pretty quickly.
Final Steps!
3. When you are done editing, use the navigation arrows to ensure that all changes have been saved. Check all numbers! If you mess this up, you can destroy your battery.
4. Connect your system to solar power and watch the charge voltage. If it charges up to the charge limit voltage that you programmed, you are good to go.
4. Connect your system to solar power and watch the charge voltage. If it charges up to the charge limit voltage that you programmed, you are good to go.

